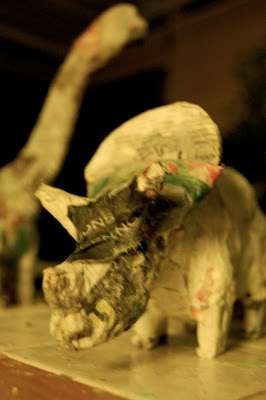
So in keeping with this, kiddo and I made some Paper Mache Models of our own! Here is the tutorial! (bear with me, I am still learning how to create these!)
Start by watching this video from Martha Stewart that gave me the basic structure idea
So cut out the basic body shape of your favorite dinosaur from cardboard, with out the extras like legs, horns, spikes, etc...

(these have the legs glued on already, but imagine them without)
Cut out legs and two small round disks for each leg. Have a kiddo help you glue the disks together - so you end up with 4 stacks of 2 disks each. (hint: Triceratops and Stegosaurus have longer back legs than front, but Brachiosaurus has longer front legs than back!)

Glue the legs on placing them on top of each disk stack...

The disks make the shape 3-D!
After the glue dries, you will want to prepare your paper mache "goop" (a kiddo term). I use flour and water (+a pinch of salt), mixed to create a liquid consistency (not too watery). You can also use a glue and water mixture, but again, not too watery ;)
In the video they use a pre-made paper mache powder, but if you are like me with newspapers lying around, they work just as well. I tend to like the texture they provide also :) If you use newspaper, rip it up into 2 in wide by 6 in long strips (approximate!!)
Start by securing the leg joints by wrapping the disks first....use a few layers....

Let that layer dry....and then start adding the bulk of the body...dip a strip of newspaper into the "goop" and make it into a ball, this adds bulk quickly...


Let this layer dry while you cut out all the extra parts, (a collar for Triceratops, plates for Stegosaurus). Horns and spikes can be made with the paper mache itself.
I glued the plates on....but stuck the collar of the Triceratops into the paper mache...


After this bulk layer dries wrap the whole dino in one last (flat) layer of paper mache to make it smooth...

Last step! Have a kiddo pick the colors and paint paint paint!

Done :) Yay!!


What a lucky kid to have such a creative mom! This is such a cute and fun idea.
ReplyDeleteThis comment has been removed by the author.
ReplyDeleteabsolutely adorable and totally smart!
ReplyDeletethats pretty cool :)
ReplyDeleteVery cool, thanks for sharing! :)
ReplyDeleteThanks for visiting B! Do your boys like dino's too?!
ReplyDeleteAwesome!!! Do you think it'll work with a group of kids? I'm sure it'll be messy happy joy joy rawwrrring fun! Thank you :0)
ReplyDeleteLove! My son is turning four and has requested a dinosaur birthday! I want to make some of these for centerpieces.
ReplyDeleteWe tried it and it is brilliant! Great idea, thanks.
ReplyDelete